Tuesday 21 August 2018

How to Fix iPad Dock Off Center


How to Fix iPad Dock Off Center

Why iPad Dock Is in Wrong Place?


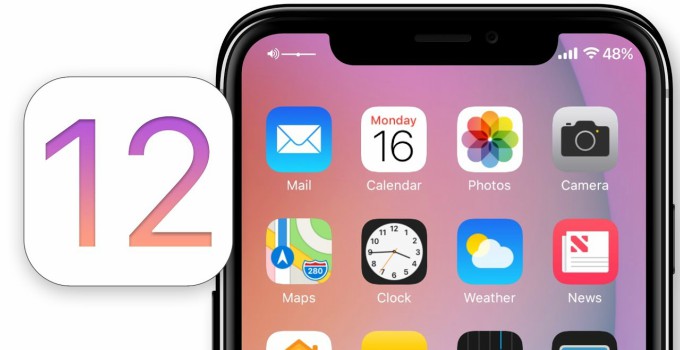
There are many reasons that would cause your iPad Dock off center. However, most iPad users claim that the issue is caused by viewing full screen ads in games like The Walking Dead: No Man's Land. Playing portrait and landscape videos brings about resolution changes, making the Dock floating. Therefore, if you alter the screen resolution or any display settings on your iPad, this issue could occur. Besides, this problem might come after updating your iPad to iOS 12 due to the changes brought by new features. Read on to see how you can solve it.


Way 1. The Workaround for Urgent – Restart the iPad


Doing a simple restart could help solve the iPad Dock moving to wrong place problem you are facing. Follow these simple steps to restart your iPad:


Press and hold the Power button until the Slider appears.


Swipe the Slider to turn off your iPad.


Press the Power button to turn on your device again.


Way 2. Change the Screen Orientation


There are two types of screen orientations – Landscape and Portrait. Changing the orientation to either portrait or landscape can assist to fix iPad Dock off center. Therefore, if your iPad is already in portrait mode, trying switching to landscape mode and see whether the problem persists.You may also like:how to format laptop


You can change your iPad's screen orientation by following these steps:


Go to Control Center.


Select the Portrait Orientation icon to switch between portrait and landscape. If the icon is highlighted in red that means your iPad is using the portrait orientation. Just tap on it to change it back to landscape.


Way 3. Turn Zoom Off on your iPad


Another way to fix the floating iPad Dock is to turn off Zoom. If you are using this feature, it could be the reason why you keep the Dock in right place.


To see whether Zoom feature is on, Go to Settings > General > Accessibility, and then Zoom. Disable if you have enabled it. Additionally, change the Zoom Region from Full-Screen Zoom to Window Zoom to fix the problem.You may also like:how to use move to ios


Way 4. Turn Off Multitasking Settings on iPad


If you are still not able to fix the problem even after trying the aforementioned methods, you should consider turning off Multitasking Settings. To do this, just follow these simple steps:


Go to Settings > General and then Multitasking & Dock.


Toggle off all features like Persistent Video Overlay.


Return to the Home screen and the Dock should have kept in right place.


For now, check:Free iTunes/iPhone Backup Extractor for iPhone, iPad

Jihosoft iTunes Backup Extractor free is a powerful tool to recover and extract important data from iPhone, iPad & iPod touch backup on Windows or Mac.
Jihosoft Android Data Recovery: the best Android Data Recovery software for Windows and Mac to recover deleted contacts, messages, photos, videos, WhatsApp and etc from Android devices.
Gihosoft Android data recovery Free is a super awesome software specialized in Android file recovery. With this program, you are able to recover deleted photos, music, videos, messages, contacts, call logs, WhatsApp messages, Viber chat history and more from Samsung, Huawei, LG, HTC, Motorola, Google, Oneplus, Sony, Lenovo, ZTE and other Android devices directly. Meanwhile, this Android data recovery software is available for both Windows and Mac platforms.
If you can’t sync with iTunes and want to rescue data from a disable iPhone, you could try Gihosoft iPhone Data Recovery. Also feel free to ask questions on the iDevice is disabled error in the comments section below.

Thursday 16 August 2018

Apple Releases Public Beta 6 of iOS 12 How To Install

After seeding 7th iOS 12 Beta for developers, Apple now pushed 6th beta for the general public. Installing public beta is completely free but requires some steps that we will mention in this post.


iOS 12 comes with many features like ARKit 2, smarter Siri, updated apps like News, Stocks & Voice Memos, CarPlay support for third-party navigation apps, Memoji on iPhone X, group FaceTime call and many more. Check out all the features here.


If you have a compatible iOS device that supports iOS 12, then you can install it by going to Apple’s Website and registering with Beta Software Program which is completely free.


To begin downloading iOS 12 Public Beta on your device, you need to Sign Up for Public Beta Testing Program first which is as below:
Launch Safari on iPhone or iPad & Go to beta.apple.com
Tap Sign Up if you haven’t already
If you have already signed up earlier, tap on Sign In & Enter your Apple ID and password
Accept the Terms & Conditions
Tap iOS tab & then tap “Enroll Your Device”
Scroll Down & tap Download profile
Tap Allow
It will redirect you to iOS beta software profile in the Settings app. Tap on Install at the top right corner
Enter Passcode – Install – Install – Restart
Now the things are easy! It will now show iOS 12 Update in the Setting apps.
Jihosoft Giveaway Alert:
The best iPhone Backup Extractor software to extract photos, text messages, contacts, voice memos, note, WhatsApp, Viber and etc from iPhone/iPad backup.
Jihosoft Android Data Recovery: the best Android Data Recovery software for Windows and Mac to recover deleted contacts, messages, photos, videos, WhatsApp and etc from Android devices.
If you can’t sync with iTunes and want to rescue data from a disable iPhone, you could try Gihosoft iPhone Data Recovery. Also feel free to ask questions on the iDevice is disabled error in the comments section below.

How to Install iOS 12 Public Beta on iPhone & iPad
After your device has been rebooted, open Settings app >> General >> Software Update
Tap the Download and Install button and tap on Agree at the bottom right-hand corner of the Terms and Conditions page to begin downloading
After the downloading process is completed, tap Install Now to start the installation of iOS 12 Public beta

Wednesday 15 August 2018

Download iOS 12 Beta 8 without developer account


WHAT’S NEW IN IOS 12 BETA 8?

Unlike previous beta versions, this update only improves performance without bringing any new enhancements. Its build number is 16A5357b and the update weighs about 100-400 MB on all compatible devices.

According to its release notes, the poor performance of Beta 7 is now fixed. Group FaceTime calls continue to elude users as usual.

The eight beta also quashes a few other bugs. However, the bug that forces the Settings app to close is still present.


You can download this update from Apple Developer Center if you have a paid developer account. If you are an average user who wants to update to the latest version, you can use the download links below.
If you can’t sync with iTunes and want to rescue data from a disable iPhone, you could try Gihosoft iPhone Data Recovery. Also feel free to ask questions on the iDevice is disabled error in the comments section below.

Important – Download links will go live within a few minutes.
IOS 12 BETA 8 DOWNLOAD


OTA Profile
SHOULD YOU UPDATE YOUR DEVICE?

This update is critical and if you updated to iOS 12 Beta 7 a few days ago, you must update your device again to iOS 12 Beta 8. Users who have already updated confirm that this version fixes performance issues of the previous beta.

Jihosoft Giveaway Alert:

iPhone Backup Extractor - Extract Data from iPhone Backup

The best iPhone Backup Extractor software to extract photos, text messages, contacts, voice memos, note, WhatsApp, Viber and etc from iPhone/iPad backup.

Must Read:Jihosoft iTunes Backup Unlocker

Jihosoft Android Data Recovery: the best Android Data Recovery software for Windows and Mac to recover deleted contacts, messages, photos, videos, WhatsApp and etc from Android devices.


Sunday 12 August 2018

Fixes for “There was An Error Connecting to the Apple ID Server”

Fixes for “There was An Error Connecting to the Apple ID Server”
1. Check If Apple’s Servers are Down


The first thing you ought to do when you receive this error message “There was an error connecting to the Apple ID server” is to check if Apple Servers are down. Here is how to check if Apple servers are down:


Step 1: Open Apple’s official site, locate “Support” menu, Type “System Status”, and hit the hyperlink under the first option. This will display all Apple’s available services, iCloud, and Stores.


Step 2: Check the left side of the Apple ID service you want to log in to, it should be green. But if the color is red, yellow or orange, then you know that the service is unavailable.


2. Check and Try Another Internet Connection


With a poor internet connection, there will be higher chances of “Verification failed. There was an error connecting to the Apple ID server”. Therefore, if you’re experiencing Apple Server connection error, you’ll need to check your internet connection by playing an online video or try to connect to another Wi-Fi network.


Here is how to connect your iPhone to a Wi-Fi network:


Step 1: From your Home screen, go to Settings > Wi-Fi.


Step 2: Turn on Wi-Fi, and your device will automatically search for available Wi-Fi networks.


Step 3: Select the Wi-Fi network you want to connect to, and enter the password for secured Wi-Fi network, then click “Join”.


3. Sign Out and In Apple ID


If you keep experiencing “Verification failed, There was an error connecting to the Apple ID server” even after using the above two solutions, then you’ll need to sign out and into Apple ID server. Here are the steps:


Step 1: Launch iPhone Settings app, and click “App and iTunes Store”. Choose your account and tap on “Sign Out” to log out of your Apple iTunes account.


Step 2: Sign in to Apple iTunes account again with your login credentials. Hopefully, this will correct the error.iPhone backup extractor :The best iPhone Backup Extractor software to extract photos, text messages, contacts, voice memos, note, WhatsApp, Viber and etc from iPhone/iPad backup


Gihosoft Free iPhone Data Recovery is a professional iPhone Data Recovery software to get back all your lost text message, photo, video, call history, note, contact and more from iPhone/iPad/iPod Touch. It offers a full solution to recover your lost data in different tough situations. Besides recovering data directly from iPhone, iPad and iPod touch, it also allows you to recover data from iCloud and iTunes backup files.
4. Check Date, Time and Language Settings


Many iPhone users who have encountered this error on the windows computer reported that they were able to solve the problem by editing their Windows computer’s date, time and language settings.


Step 1: Open “Settings” app from the “Start” menu on your windows computer, and click “Time & Language”.


Step 2: Check and correct data, time and language settings by locating “Date & Time” section. Then turn on “Set Time Automatically”. Go to “Region & Language” to adjust language settings.


5. Restart iPhone


Restarting your iPhone can refresh your iPhone settings and probably fix the problem “There was an error connecting to the Apple ID server”. Here is how to restart an iPhone:


Step 1: Press and hold the Side button and any of the volume buttons until the slider appears.


Step 2: Drag the slider to turn off your iPhone.


Step 3: Press and hold the side button until you see the Apple logo.You may also like:

save twitter videos


Jihosoft iPhone Backup Extractor Extract and recover all types of data from iPhone backup files, such as camera roll photos, videos, SMS, contacts, reminders, WhatsApp, and etc.
6. Hard Reset iPhone


You can hard reset your iPhone to solve the error in Apple ID server. Here is how to hard reset an iPhone:


Step 1: Press and Hold the Home button while holding the Sleep & Wake button as well.


Step 2: Keep holding the two buttons until you see the Apple logo.
7. Update to the Latest iOS System


Updating your iPhone to the latest iOS system can help solve “There was an error connecting to the Apple ID server” if it persists. Here is how to update your iPhone to the latest iOS system.


Step 1: Plug your iPhone into a reliable power source, and connect to a Wi-Fi network.


Step 2: Click Settings > General > Software Settings.


Step 3: Click “Download and Install. You can choose to install now or later.Gihosoft Mobile Transfer: 1 Click Data Transfer from Phone to Phone Gihosoft Mobile Transfer is a powerful phone to phone transfer software lets you easily transfer contacts, music and more between mobile phones.

Any app suggestions or topic recommendations are appreciated in the comments down below.

Emmy Magazine Subscribers Get 3-Month Apple TV+ Subscription for Fre

Apple is already offering one year of free membership to Apple TV+ to all new iPhone, iPad, and Apple TV owners. Now to further market its s...